For my birthday my wonderful girlfriend got me a new Garmin Rino 655t GPS radio. I was blown away to say the least! This new GPS is amazing! But that’s not the point of this post. The point is that this receiving this new GPS unit got me to checkout the latest Garmin software in which I found some very useful capabilities,
I had used the Garmin MapSource with Trip and Waypoint Manager software for years now and it works great for managing the data on my GPS and transferring it to and from the PC, but there isn’t a whole lot more that you can do with it. After getting my new GPS I checked out the Garmin site and found a new piece of software, Garmin BaseCamp. Basecamp has similar functionality to MapSource, but also includes some interesting features like the ability to playback a set of tracks and the ability to load BirdsEye imagery to the GPS unit. It also has the ability to Export items to Google Earth. Using this feature we can get out GPS data into Google Maps
Google Maps allows you to create custom maps that include waypoints, paths, pictures, etc. Points can be entered manually or imported into Google Maps as .kml or .kmz files. The problem is that the Garmin software does not allow you to export data in these formats. Google Earth however, does. With BaseCamp’s ability to export data to Google Earth, we can use Google Earth as an intermediary to get GPS data into Google Maps.
Requirements
To get your GPS data into a Google Map you will need the following:
- Garmin Basecamp
- Google Earth
- A Google Account
Procedure
Perform the following steps to get your GPS data from your GPS unit and into Google Maps. In this example I will show how to transfer GPS tracks (breadcrumbs).
- Open BaseCamp and load your GPS data into the program. You can use BaseCamp to transfer the data directly from the GPS or to open and existing GPS data file.
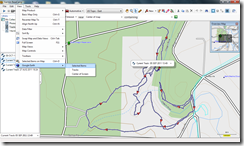
 Select the data you wish to load into Google Maps then go to the View menu and select Google Earth. From the sub menu click Selected Items. See the image to the right for an example.
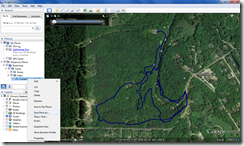
- Google Earth will open and the selected data will be loaded into the Temporary Places folder in a sub folder named BaseCamp. This folder will contain all the data that you selected to be exported to Google Earth. Tracks can be found in the BaseCamp –> Tracks –> Paths folder. Select the tracks and any other items you wish to load into Google Maps the right-click on one of the
 items and select Save Place As… An example can be seen to the left.
 - In the Save file… dialog, select Kmz from the Save as type: drop down menu then name the file and click Save.
- Open a web browser and navigate to http://maps.google.com. If you are not already logged into Google, do so now.
- From the pane on the left click the My places button then click Create Map.
- The pane loads with some fields that allow you to name your map and give it a description. This pane also lets you select whether the map should be listed publicly or not. The map itself loads the editing tools in the upper left allowing you to add placemarks and paths manually.
- At the top of the pane on the left click Import. This presents the Import KML dialog asking you to point it to a file. Click the Browse… button and navigate to the folder where you stored the .kmz file you saved in Google Earth. Select the file and click Open. Click the Upload from File button to start the upload.
 After the file is processed by the server, the data appears on the map including any tracks and waypoints. Click Done from the pane on the left to finish editing the map. You now have imported your GPS data into Google Maps!
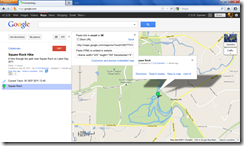
- Finally, to share the map, click the chain link icon at the top of the pane on the left. This will open a box containing a link directly to the map as well as HTML code to embed the map in a web page. See the image to the right for an example.
And that’s it! Your GPS data is in a cool Google Map that you can share with the world and show where you’ve been! The map I created in this example can be seen embedded below.
View Squaw Rock Hike in a larger map

Thanks–the procedure you describe worked nicely for me, once I discovered that the file format in which the Google Earth path needs to be saved is not kmz but kml.
I discovered that if what I want is to copy not tracks but routes, it’s not necessary to have BaseCamp create a track from the route. You just view the route in Google Earth and save it as a kml file.
You can cut out Basecamp altogether. Just connect your GPSr to the computer, open Google Earth and select the Tools menu, then GPS. In the window that opens select your GPSr, and select Tracks for import and KML Tracks for output and your track files will be displayed in Temporary Places as KML files on Google Earth
Excellent! Thanks!
Awesome, trying to figure it out. Thanks for sharing.
I have one more thing I am struggling with. My gps is one that makes pictures and these are added automatically into the gps file. These show in basecamp and i would love to get them automatically into google maps as well. Somehow it shows the waypoints, but the pictures are lost somewhere in the process. They don’t show up in google earth. Do you know if this is possible somehow? Thanks a lot